

Y? Because Professional Use Pen tool. Yes, The thingy that looks like a pen but nobody tells you how to use it.
Lets use this pix right here.

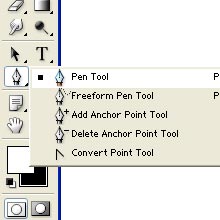
It wont be that hard actually to use magic wand and/or other tools but it'll serve the purpose. First, select the pen tool. It looks like this:
 Selecting the button will change your cursor to a pen cursor. Click on any starting point on the image that you want to crop. A black dot as such will appear:
Click on the next point but dont release the mouse button. Dragging the mouse, you can see there's a line coming out from the point that you click, as such:

The line determine the angle of the curve between subsequent dots. it will control the curve of the next line as well. If you pull the line enough, the next line will be a curve without you having to adjust anything. It's difficult to understand, but try it, it's gonna take some time but once you get the hang of it, it will be easy. Holding alt button will allow to modify the position of a point will ctrl will allow you to change the curve.
The function of it? Okay. To use a path (all this dots, lines, and curves are called path), when the pen tool is active (the shortcut is button P by the way,) right click on the canvas. Following menu will appear:

I won't pretend I know everything. But the custom shape is easy enough. By clicking this menu, the shape that you created will be automatically generated into the custom shape button (where you create rectangles, squares and all that). The shape will be proportionately the same regardless of how you stretch it. Not useful enough? Imagine this, by outlining your picture, you can create a silhouette of yourself anytime, at any size. Awesome ain't it.
 The fill path is also easy. (I skip the make selection for now) If your path is closed, meaning it go all the way back to the beginning dot, you can fill it with any colour you like. Finish the path, then change the colour in your foreground, background colour here:
The second menu i know is the selection menu. Again, close the path or the system will close it for you, joining together the last dot and the first one. A window of Make Selectin will popup. Now, the first option is the most important one. When you cropping with intention of laying the image on top of another image, you have to increase the feather radius feature. This feature allow you to capture some colour from nearby pixels, giving the pixture a more natural look in the new layer. But when you want to isolate this cropped image from the rest, add filters to it or what not, basically not superimposing, then you want the crisp edge at radius feather = 0. See the following for example:

One of the most important function of this tool is to stroke it. After you finish any path, select the type of brush you want, and right click > stroke path. Look at this two path and see the results.


Awesome ain't it. If you're result is not the same, then tick the simulate pressure button. Also, change the settings of your brush. The button is on the right panel of your screen.

See how i manipulate the shape of the brush there? That'll make it slanted a little bit, much a calligrahy. Make sure also the control menu on the shape dynamic (Click on the word 'Shape Dynamic'") is set to fade. You can control how much the brush will fade away by adjusting the slider below it.
By the way, all your path is saved in the path tab. Here:

The stroke fade works this way: Starting point of a path will be thicker (If you set the fade option stated above la..) You can also set many 'sub-path' by clicking anywhere on the canvas while holding ctrl button. Understand? For example, you want to create lines, after end of each line, hold ctrl and click on the canvas and the continue create new line.
You can also create a new line by clicking on appropriate button on bottom of the tabs while saving the previous one. Deselect a path by clicking on empty space on the path tab. Easy enough?
I never had formal training, never read a Photoshop tutorial book. I just play around with it. I suggest you do the same!
No comments:
Post a Comment